THE $2.00 BILL I TRIED TO SPEND:
IF YOU'RE AS OLD AS I AM, THIS IS A RIOT!
Everyone should start carrying $2 bills!
I am STILL laughing!!
I think we need to quit saving our $2 bills and bring them out in public. The younger generation doesn't even know they exist.
STORY: On my way home from work, I stopped at Taco Bell for a quick bite to eat. In my billfold was a $50 bill and a $2 bill. I figure that with a $2 bill, I can get something to eat and not have to worry about anyone getting irritated at me for trying to break a $50 bill.
Me: 'Hi, I'd like one seven-layer burrito please, to go.
'Server: 'That'll be $1.04.
Eat in?'
Me: 'No, it's to go.'
At this point, I open my billfold and hand him the $2 bill. He looks at it kind of funny.
Server: 'Uh, hang on a sec, I'll be right back.'
He goes to talk to his manager, who is still within my earshot. The following conversation occurs between the two of them:
Server: 'Hey, you ever see a $2 bill?'
Manager: 'No. A what?'
Server: 'A $2 bill.
This guy just gave it to me.'
Manager: 'Ask for something else.
There's no such thing as a $2 bill.'
Server: 'Yeah, thought so.'
He comes back to me and says, 'We don't take these. Do you have anything else?
'Me: 'Just this fifty. You don't take $2 bills? Why?'
Server: 'I don't know.'
Me: 'See here where it says legal tender?
'Server: 'Yeah.'
Me: 'So, why won't you take it?'
Server: 'Well, hang on a sec.'
He goes back to his manager, who has been watching me like I'm a shoplifter, and says to him, 'He says I have to take it.'
Manager: 'Doesn't he have anything else?'
Server: 'Yeah, a fifty. I'll get it and you can open the safe and get change Manager: 'I'm not opening the safe with him in here.'
Server: 'What should I do?'
Manager: 'Tell him to come back later when he has real money.'
Server: 'I can't tell him that! You tell him.'
Manager: 'Just tell him.'
Server: 'No way! This is weird. I'm going in back.
The manager approaches me and says, 'I'm sorry, but we don't take big bills this time of night.'
Me: 'It's only seven o'clock!
Well then, here's a two dollar bill.'
Manager: 'We don't take those, either.'
Me: 'Why not?'
Manager: 'I think you know why.'
Me: 'No really, tell me why.'
Manager: 'Please leave before I call mall security.'
Me: 'Excuse me?'
Manager: 'Please leave before I call mall security.'
Me: 'What on earth for?'
Manager: 'Please, sir.'
Me: 'Uh, go ahead, call them.'
Manager: 'Would you please just leave?'
Me: 'No.'
Manager: 'Fine -- have it your way then.'
Me: 'Hey, that's Burger King, isn't it?'
At this point, he backs away from me and calls mall security on the phone around the corner. I have two people staring at me from the dining area, and I begin laughing out loud, just for effect. A few minutes later this 45-year-oldish guy comes in.
Guard: 'Yeah, Mike, what's up?'
Manager (whispering): 'This guy is trying to give me some (pause) funny money.'
Guard: 'No kidding! What?'
Manager: 'Get this. A two dollar bill.'
Guard (incredulous): 'Why would a guy fake a two dollar bill?'
Manager: 'I don't know. He's kinda weird. He says the only other thing he has is a fifty.'
Guard: 'Oh, so the fifty's fake!'
Manager: 'No, the two dollar bill is.'
Guard: 'Why would he fake a two dollar bill?'
Manager: 'I don't know! Can you talk to him, and get him out of here?'
Guard: 'Yeah.'Security Guard walks over to me and......
Guard: 'Mike here tells me you have some fake bills you're trying to use.'
Me: 'Uh, no.'
Guard: 'Lemme see 'em.'
Me: 'Why?'
Guard: 'Do you want me to get the cops in here?'
At this point I am ready to say, '
Sure, please!' but I want to eat, so I say, 'I'm just trying to buy a burrito and pay for it with this two dollar bill. I put the bill up near his face, and he flinches like I'm taking a swing at him. He takes the bill, turns it over a few times in his hands, and he says, '
Hey, Mike, what's wrong with this bill?'
Manager: 'It's fake.'
Guard: 'It doesn't look fake to me.'
Manager: 'But it's a two dollar bill.'
Guard: 'Yeah? '
Manager: 'Well, there's no such thing, is there?'
The security guard and I both look at him like he's an idiot, and it dawns on the guy that he has no clue and is an idiot. So, it turns out that my burrito was free, and he threw in a small drink and some of those cinnamon thingies, too. Made me want to get a whole stack of two dollar bills just to see what happens when I try to buy stuff. If I got the right group of people, I could probably end up in jail. You get free food there, too.
Just think...
those two will be voting soon...YIKES!!!
Too late, we already have a nation full of them.

Friday, October 31, 2008
Tuesday, October 28, 2008

Ta Dah !!!! a new award has been given to me :)

***************** I fell down on the Job on this award.*********
I don't know if this was given to me when I had all the bad things going on in my life and just set it aside and said I will get to it tomorrow!!!! I am so embarrassed that I let this award slip by. As it was so sweet to get this award from CraftySusie... I am so sorry!!! Please for give me for my error!!!!
Another Award
To my great pleasure, Today, I received another award. This is from Sue
Craftysusie to me .http://craftysusie.blogspot.com/Thank you so much!This award acknowledges the values that every blogger shows in his/her effort to transmit cultural, ethical, literary and personal values every day.The rules to follow are :1) Accept the award, post it on your blog together with the name of the person that has granted the award and his or her blog link.2) Pass the award to other 15 blogs that are worthy of this acknowledgment.Remember to contact each of them to let them know they have been chosen for this award.I would like to thank my dear blog friend Maura for this important award; I am honoured that she has chosen my blog among the 15 blogs to be awarded.Now it is my turn to pass it on to other 15 blogs... this is not an easy task as all the blogs I visit merit this acknowledgment but I have to go by the rules and choose only 15.
I will say that since I didn't get this award posted like I should have.. I award it to all of my blogging friends, and followers....
Thursday, October 23, 2008
FLIGHT SCHOOL
My ex-wife started taking flying lessons about the time our divorce started and she got her license shortly before our divorce was final, later that same year.
Yesterday afternoon, she narrowly escaped injury in the aircraft she was piloting when she was forced to make an emergency landing in Western Iowa because of bad weather. Thank God our kids were with me at the cabin this weekend.
The NTSB issued a preliminary report, citing pilot error: She was flying a single engine aircraft in IFR (instrument flight rating) conditions while only having obtained a VFR (visual flight rating) rating. The absence of a post-crash fire was likely due to insufficient fuel on board. No one on the ground was injured.
Photographs below were taken at the scene show the extent of damage to her aircraft. She was very lucky.

Remembering Days gone by ...
 The little poems on this little cards just crack me up.. Some of the wordings are so out of place... Like using: Have a Merry Halloween... now that's just wrong.. Merry has to be with Christmas... Don't you think?
Have you noticed that oranges, reds, greens, and black was the usual colors of these old postcards? Very little Blue and No Purple. I don't know about you but I really like the color purple for Halloween :) It just seems to be a color that was meant to marry the color orange :) Purple is so grand and rich... LOL my bedroom was painted a very light color purple when I was a child. Which brings another story of long ago to mind.
When I was a very young girl of the tender age of 5 I wanted a pair of cowboy boots. Every child that lived on the farm had to have a pair of cowboy boots. It was getting along Christmas time and I was asked what I wanted Santa to bring me.....of course I told them I wanted Cowboy boots. To their reply what color do you want them. Being a child I told them what my favorite color was Purple. Now back in 1960 I don't know if they even made boots in really cool colors like that. But Purple is what I asked for. I ran along and didn't think much more about it.
That big wonderful shiny and bright Christmas day came and it was time to open the gaily wrapped packages under the tree.
My first Gift I opened was????????????? you guessed it. It was a Barbie and a Ken Doll with some new outfits. The second gift I opened was a House to put Barbie and Ken in after playing with them. Of course there was the usually little wonderful stuff in our stockings. Apple, orange, candy canes.. not those wimpy little ones like you get now .. but the huge ones that were as long as a ruler and as big around as a cucumber. One that would take you all month to eat. There were rope suckers, raisins, rulers, erasers, those Chinese finger cuffs, I even got a Snow White wrist watch in the stocking. Then it hit me after all the wrappings were picked up and put away.... Santa did not bring my Purple cowboy boots.
I didn't say anything ... Grandfather was looking at me with this quizzical look. He motioned me to come over to his chair. I walked over and he hoisted me up on his lap. Grandfather smiled and gave me a huge hug told me he loved me and reached behind his chair and pull out a box. He asked me to open it ... I did and there in that box was a pair of the most beautiful purple cowboy boots that I have ever seen ... even with all the fancy expensive cowboy boots that I now own... and all the ones I have seen up until now.. those where the most beautiful ones I know I will ever see in my life. How he found them or where he got them I don't have a clue... But from that day on I knew my Grandfather walked on water.
.jpg)
Tuesday, October 21, 2008
OH YuMmY !!!!!
 Spiders are even cup cakes :)
Wow these are some creative people that made these wonderful looking deserts. I can only imagine what mine would look like.. Maybe like the cake my younger sister Allie and I made one year. I was in Junior High and she was in Grade School. I still laugh my butt off each time I think of her and I making that cake. Today that poor thing would have been pitched.
We bake this Chocolate cake for our Halloween dinner.. While we were baking the cake... we made the frosting... we wanted black frosting.. so being stupid kids.. We had those little boxes of food color.. you know the ones with Yellow, Green, Red, Blue, Orange, Is there another color??? I thought there was six colors in there. We wanted black so after talking it over for 10 minutes or so....on how to make black frosting. We came up with a plan on how to make it with what we had on hand.
We took a Milk Chocolate frosting mix and added all the colors there were in the food color box. (Frosting was not in a can back then) (You had to add stuff and whip it up with a mixer) Any way we were Hoping to make Black. LOL it only came out this really ugly grayish purple color. Well that wasn't half bad.. but what was bad was .. we were taking the cake out of the oven and we dropped it in the middle of the kitchen floor. Yep you guess it... we scooped it up.. slapped some frosting on it to make it stick together and finished frosting the cake. We decorated the top with those icings in a can. I know.... I know those are no longer environmental friendly because of the propellant to get the icing out.. But you have to remember that was over 30 years ago..that we made this cake...Who would have known that my icing would kill the ozone layer. Now its frosting in a tube. The final result turned out pretty good.. my sister is the artist in the family and she did a great job of it. We had a haunted house and Ghosts on top.

We served up the cake after dinner and everyone told us how yummy and moist it was... All we could do was look at each other and smile. That scooping up the cake was way before the 3 second rule. Which is always funny to me now...I laugh each time I see someone scoop up something they dropped and pop it in their mouth. It's strange now.... if something drops out of my hand.. it goes straight into the trash... no brushing off, no blowing, no taking a towel to it.. it gets pitched... do you think its because of that cake????? I am so strange about dropped food????
.jpg)
Feeling Good :)
I Did it.. I made a new Item for my Etsy Shop
I spent the day working on a new pet apparel design. These can be used for your Dog or Cat. The prototype was completed with great success. I have been thinking about this item for a long time. Almost since last Winter... The first try of my new design turn out fantastic.. See the one below.. that was the first one :) Now I have went into production. LOOK LOOK here is a photo of a finished one now :) What do you think?
.JPG)
This little bow tie is made from fabric... it is a faux leather. The material is washable in cold water. Line dry or low dryer temp. I think you can even press it with a cool iron. I can tell you this material is a dream to sew. My Baby lock just sewed right through it like slicing soft butter.
.JPG)
I have even went as far as making them with up-cycled fabrics.. I love doing the save the Mother Earth Thing. Remember my Motto ... Saving Mother Earth one Fabric and Button at a time ;)
You say to yourself.. hum I would love to have one of those for my little dog Fi Fi....now to find these wonderful little bow ties.... you have to go to my Etsy Shop. Just click on my link http://AuntPittyPats.etsy.com/
I thought this would be a fun way to dress up your companion without putting a dress or harness on your fur baby. I am going to also make these in Christmas fabrics for the holiday. I will start those next weekend. The rest of my weekend is for apron swaps, unless I get caught up on those :)
Then I will start on the little bow ties again. I hope these sell out fast. They are a lot of fun to make. I have more ideas.. but those will be made down the road. Exp: one could always put the bling bling on them :)
.jpg)

Thursday, October 16, 2008
Felt Slippers/ Felted Wool ???

1.(2 slipper tops with branch outline, 1 left sole, 1 right sole, 1 branch), resizing as desired; print onto card stock, and cut out all templates.
2. Cut equal rectangles of heather-brown felt, salmon felt, and fusible webbing (leaving 1 side of paper backing on), each large enough to accommodate 2 slipper tops.
3. Stack brown felt and fusible webbing (paper side up).
4. Lay slipper-top templates side by side on stack. Using a pencil, trace templates, marking notches A and B as indicated on templates.
5. Place branch template on 1 traced slipper top, using marked points to position properly, and trace. Repeat on second traced slipper top, flipping branch template to trace a mirror image. Cut out branch designs, slicing through webbing and felt with a craft knife.
6. Carefully remove paper backing from fusible webbing; webbing should stay in line with cut edges of branches. Stack salmon-felt rectangle on webbing, and flip over (keep branch shapes in position). Iron, following webbing manufacturer's instructions, with brown side up. Lay slipper-top templates on fused felt, and align notches A and B with tips of branches and leaves. Trace with a disappearing-ink pen. Cut out slipper tops, cutting through notches.
7. Cut equal rectangles of heather-brown felt, salmon felt, and fusible webbing large enough to accommodate 2 soles. Stack layers, with webbing in middle. Iron, following manufacturer's instructions on webbing. Lay templates for both soles side by side on fused fabric; trace with disappearing-ink pen. Cut out soles.
8. With a sewing machine, sew closed the vertical seam at back of each slipper top with a zigzag stitch (do not overlap fabric; instead, align edges, and stitch).
9. Pin 1 sewn slipper top to 1 sole, brown side down. Starting at heel, sew around perimeter of slipper, leaving a 1/4-inch seam allowance. Repeat to finish second slipper.

For Butterfly Slippers
1. (2 slipper tops, 1 left sole, 1 right sole, butterflies), resizing as desired; print onto card stock, and cut out all templates.
2. Cut equal rectangles of cream felt, white felt, and fusible webbing, each large enough to accommodate 2 slipper tops. Stack layers, with webbing in middle. Iron, following webbing manufacturer's instructions.
3. Lay slipper-top templates side by side on fused felt. Trace with a disappearing-ink pen, and cut out slipper tops.
4. With disappearing-ink pen, trace butterfly templates onto different shades of pink felt. Cut out shapes.
5. Secure butterflies to cream side of slipper tops with straight pins or fabric glue. Using a sewing machine, stitch along midline of butterflies to secure to slippers.
6. To finish slippers, follow steps 7, 8, and 9 in "For Branch Slippers," using cream and white felt (cream side down on soles).

Wednesday, October 15, 2008
The Story of Flat Jack ...
 I just came across this today.. I think it is the funniest thing that I have ever seen or heard about next to Flat Jack. My Sister Allie out in Concord Ca, is a teacher. They have Flat Jack in their class room.
 Let me tell you what I know about this interesting little guy. Flat Jack sent out a request to get post cards from all over the world. Each one of the 1st grade teachers had this project for their students. Poor little Jack he did not get much attention until my sister told her family members about how sad poor little Flat Jack was doing on his post Card request.
Mom was talking to a friend who was going to Florida. She was going in a real round about way. They were going to go see family in Nashville TN first before Florida. Every stop along the way this sweet woman from mom's VFW club sent a Post Card to Flat Jack. I was told She sent about 12 cards total.
Allie was talking to Ursula my sister here in Kansas about Flat Jack.. well then my sister got on the band wagon. Don't ever tell my sis about a project because she will come up with a great solution... :)
OK Ursula got everyone she knew that was going out of town to send a card. Several people from her Church were going on different little trips over the holidays. She had 14 people report that they had sent off post cards to Flat Jack.
Then... do you hear the suspenseful music in the back ground???? A huge box came to Allie at her school. Allie could not think of anything she ordered for the class room. So she took letter opener in hand and opened up the box. Inside the box was another box with the presidential seal on it. Inside that box was a signed picture of the President and his family, also a signed picture of the presidents dog... now for the life of me I can not remember that dogs name. There was tons of other things that were sent to my sisters class to use for Flat Jack project. There were pencils, stickers, rulers, crayons, you name it.. it was sent. My sister was shocked all of this from the President of the United States!!!!
How did this surprise package come to be for Allies Class?????
My sister Ursula as a joke when she was in High School sent the President a letter telling him of her Graduation, and invited him to attend the ceremony....the President sent her back a letter telling her how proud he was of her, and he was very sorry he could not attend. But he did encouraged her to go on to collage. My sister still has that letter. So she thought to her self......I wonder if he would send something to my sisters class. Sure enough he did. That is how Flat Jack got his box of goodies from the President of the United States.
Last year was Allies first year of Class rooms, as she only graduated Collage that Spring. What a great way for her to start out her first year with such a successful project for her students. My sister was the envoy of every teacher there in her school last year. I wonder what she will do this year to top that???? Or should I say what will Flat Jack do this year????
Just click on Photo to go check out Flat Betty :)
.jpg)
Public Service Announcement... for the Joys of Halloween
 Make Halloween safe, not scary: Drunk driving is a deadly crime that leads to terrifying tragedies every day on America's roadways. This Halloween (and everyday), celebrate safely by making a commitment to not drink and drive. Designate a sober driver, call a cab or use public transportation to safely make your journey home after celebrating the holiday.
The Holidays are here :)

Last Day to Sign Up: October 24, 2008Last Day to Mail Packages: November 24, 2008
Package Requirements:You are to make glamorous, girlie aprons that you could wear to a festive holiday party to spice up a basic black dress for Thanksgiving, Christmas, Solstice, and/or New Years. You will make an adult size glamorous Holiday Hostess apron and your unknown pal will make one for you.
You will send your partner:
1. Handmade apron for your partner to wear this holiday season. Please embellish generously and make this extra special. Special fabrics are encouraged … silk, velvet, tulle, organza. A great source for special fabrics is thrift stores and then repurposing former prom or other special occasion dresses.If sewing isn't your forte but you really want to participate, please purchase a handmade apron from one of the talented people at Etsy.com.
2. For a special add in, you will need to include something special for the Holiday Hostess to wear to her party: a necklace, a beaded bracelet, a fancy headband. Be creative, shop the sales, or make something sparkly yourself. Please spend between $5 and $10 for this part of your package.Wrap it up nice and send it out BEFORE Thanksgiving!!
Click here to sign up :
Let's Party :)
Tuesday, October 14, 2008
BFF Gold Card Award
 My online friend Ginger just surprised and honored me with the “Blogging Friends Forever" Award. I take that as a real compliment.
The rules are:
1. Only five people allowed.
2. Four of them have to be dedicated followers of your blog and one has to be new and live in another part of the world.
3. You have to link back to who gave you the award. It’s difficult to restrict it to 5!
Therefore, I am passing this award on to all who I have linked here on my blog. Its very hard to pick and choose between them, they all are amazing with wonderful blogs.
Thank you my sweet "Ginger" for this very nice award.
People that received this award from me.
Cathy Jean @ http://auntdaisyscottage.blogspot.com/
Roz Ca @ http://justmecraftin.blogspot.com/
New Person of Interest:
I hope you all enjoy my wonderful blog friends... Please visit their blogs often. As they always have wonderful fun and exciting projects and ideas to share with us all :)
Biology Class Test

Biology Class Students in an advanced Biology class were taking their mid-term exam. The last question was, 'Name seven advantages of Mother's Milk, worth 70 points or none at all if you can't name all seven'.
One student, in particular, was hard put to think of seven advantages. He wrote:
1.) It is perfect formula for the child.
One student, in particular, was hard put to think of seven advantages. He wrote:
1.) It is perfect formula for the child.
2.) It provides immunity against several diseases.
3.) It is always the right temperature.
4.) It is inexpensive.
5.) It bonds the child to mother, and vice versa.
6.) It is always available as needed. And then, the student was stuck. Finally, in desperation, just before the bell indicating the end of the test rang, he wrote...
7.) It comes in cute containers.
He got an A .
Skeleton and Brain Dip
 Makes:8 servings
What You Need
lettuce leaves
1 cup KRAFT Ranch Dressing
2 cups assorted cut-up fresh vegetables, such as bell pepper strips, cucumber slices, snow peas, mushroom slices, celery sticks, carrot sticks, cherry tomatoes, broccoli florets, cauliflower florets
Make It
LINE small bowl with lettuce leaves; fill with dressing. Place near one end of a large serving platter.
ARRANGE vegetables in a skeleton shape on platter, using the bowl as the head of the skeleton.
Kraft Kitchens Tips
Substitute
Prepare as directed, using KRAFT Light Ranch Dressing.
Family Fun
Try this fun way to get kids excited about eating their vegetables.


Felt Pumpkin People
These felt pumpkin people, created by artist Jennifer Murphy, are a charming Halloween decoration perfect for the home.
Tool and Materials
Felt
Straight coffee or "cushings"
dye
Scissors
Sewing needle Long,
large needle
Dental floss or waxed thread
Excelsior (wood shavings)
Black floss
Glue
Small black pins
Pinking sheers
Heavy wire
Black pipe cleaner
Two small velvet leaves
Pumpkin People: How-To
1. Begin by making the pumpkin body and head. Dye felt by dipping in straight coffee or "cushings" dye. Cut two felt circles, 4 inches and 5 1/2 inches in diameter.
2. Thread a needle with a doubled length of dental floss or waxed thread; knot. For head, make a running stitch about 1/4 inch from edge of smaller circle. Pack excelsior (wood shavings) into a ball slightly larger than the desired size for finished head. Place excelsior ball in middle of felt circle and pull thread tightly. While holding the felt ball, stitch around the opening again and knot closed. If needed, stitch around the opening a third time to pull the opening securely closed; clip thread.
3. Repeat above steps for the larger circle to make the body.
4. To make vertical lines on head, insert a needle threaded with black floss from the bottom opening to the center top of the head. Bring the needle back through the bottom, up through the top; repeat several times to create the vertical "ribs" of a pumpkin.
5. Next, make the pumpkin face. Cut 2 small triangles for eyes; place triangles on head. Secure triangles with a drop of glue and small black pins to hold in place. Insert black pin in the middle of head for nose. Cut a strip of felt about 1 inch long with pinking sheers; round the bottom by cutting with a regular scissors. Secure with a dab of glue; hold temporarily in place with pins.
6. To assemble, take a piece of heavy wire about 2 inches long and stick one end into the bottom of the head; fill the opening in the head with glue. With a large needle, make an opening in the top of the body; fill that opening with glue, then connect the head and the body together by inserting the other end of the wire into the body.
7. Thread a large, long needle with a black pipe cleaner. To create arms, make another opening in the body at "armpit position" with the needle; pull through other side of body. Repeat to make legs.
8. Cut the arms to desired length. Fold the pipe cleaner legs in half; push ends of pipe cleaners back into holes in side of body. If you are using fluffy pipe cleaners, trim the ends to be slimmer; bend into place.
9. Trim a small velvet leaf into a bow tie shape. Place a small paper fastener or gold pin in the center and press into pumpkin at base of neck; dab a little glue onto back to hold in place. Insert three more pins as "buttons" down the front of the pumpkin; glue as needed.
10. Cut down another fabric leaf to approximately 1/2 inch, leaving the long wire end attached. Bend about a 1/4 inch below the leaf. Make an opening in the top of the head and with a dab of glue, stick the leaf and wire into place. Once dry, spiral the wire around a needle.
11. Create a paper greeting banner for your pumpkin to hold. Glue in place.
Monday, October 13, 2008
Caramel Dipped Apples

Prep Time:20 min
Total Time:1 hr 30 min
Makes:5 servings
What You Need
5 medium apples, washed, well dried
1 bag (14 oz.) KRAFT Caramels (about 50)
2 Tbsp. water
Make It
INSERT wooden pop sticks (from bag of caramels) into stem end of each apple. Cover large plate with waxed paper; grease paper with butter. Set aside.
PLACE caramels in large saucepan. Add water; cook on medium-low heat until caramels are completely melted, stirring constantly.
DIP apples into melted caramel until evenly coated, spooning caramel over apples if necessary. Allow excess caramel to drip off. Scrape bottoms of apples, then place on prepared plate. Refrigerate at least 1 hour or until ready to serve. Remove from refrigerator and let stand at room temperature 15 min. before serving. Store leftovers in refrigerator.
Looney Tunes: "Broom-Stick Bunny" 7:10 mins
A Halloween Addict knows he or she is going to like this cartoon by the time you hit 2 minutes in. From the very beginning, you know something's different. First of all, the usual red concentric circles in the titles are GREEN! Soon after you find out it's directed by the legendary Chuck Jones. If ever there was a guy who knows the perfect comedic timing of a coyote falling off a cliff: it's Chuck Jones. And by 40 seconds in you see that the Witch Hazel's (HA!) calendar is on October 31st, HALLOWEEN. Bugs Bunny strolls on screen in a scary mask and the first words out of his mouth are "Boy this trick or treatin' is a pretty nice racket. Pity it only comes once a year."Amen, Bugs. Amen.
Frankenweenie (30 mins.)
This is legendary Tim Burton short. It was shown for the first time on the big screen in front of The Nightmare Before Christmas at the El Capitan Theatre in Hollywood. It has everything a horror movie fan would enjoy. The Frankensteins, shot in black & white, gravestones, the undead, Shelly Duvall from The Shining, a dog, lightning and thunder. C'mon! How could you not love this!If you haven't seen it, please give it a watch when you're not doing something. It deserves your complete attention.So there you have it.
Please watch videos from top to bottom to see full video short :)

Sunday, October 12, 2008
A Look at Friday the 13th

Halloween..... the perfect time for a Friday the 13th! But are you looking forward to it? Or does the infamous date known to be unlucky make you nervous? Different people look at the day in all different ways, from one extreme to the other.
Some view Friday the 13th as a day when something bad is just bound to happen, and to watch out or something will. These types will go out of their way in their everyday lives to avoid the chance of some catastrophe striking. They might not drive on the highway that day, not apply for that promotion until the following week, or not take that jog in the morning. In other words, their life will be put on hold because of their fears. The superstitious view that Fridays and the number 13 are unlucky stems from all different cultures and religions throughout the centuries, and the negative light in which some still view them will affect the way they live and look at the world around them.
For others, including many Halloween enthusiasts, Friday the 13th is seen as a great day. It is one that happens only once or twice a year, and because it is associated with such dark elements (of the imagination), it’s a day to celebrate that mystique about it. Rather than having doubts and fear, this second group will celebrate the day by going to see the latest horror movie, going on a graveyard tour, throwing a party, or attending a midnight showing of the Rocky Horror Picture Show. The extreme opposite of the first group, this defied and determined bunch go out of their way to see Friday the 13th as a good day, one to celebrate with darker pastimes for a supposed day of doom.
Of course, a majority of the population doesn’t feel one way or another towards Friday the 13th, neither fear nor excitement. And that’s okay. The less people afraid out there, the better, and it keeps the crowds down at all those the Friday the 13th parties!
But no matter how we see Friday the 13th, as unlucky, as a cause for celebration, or neither of the two, one thing is for certain: how we choose to view it is how it will truly affect us, and speaks more about ourselves than it does the date on the calendar. So make your plans accordingly… Will it be the night to throw a party until late in the moonlight? Or a night to hide in the closet? Since Friday the 13th doesn't fall in October this year.... have a happy Halloween anyway…
…if you dare.
Top 10 Scary Movies
 1. Alien vs. Predator
2. Freddy vs. Jason
3. Underworld Evolution
4. House of Wax
5. Silent Hill
6. The Ring Two
7. Van Helsing
8. Blade: Trinity
9. Pulse
10. The Exorcism of Emily Rose

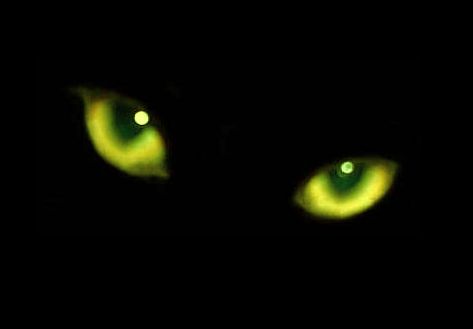
Black Cats & Halloween
Black Cats
Although cats of all types have been associated with the occult by different cultures, black cats in particular are noted most in folklore. Several legends exists about black cats being evil, causing bad luck, being the familiars of witches, and many other dark things.
Although cats of all types have been associated with the occult by different cultures, black cats in particular are noted most in folklore. Several legends exists about black cats being evil, causing bad luck, being the familiars of witches, and many other dark things.

Why is it that cats, and black cats in particular, are given these attributes? There are several possible things that may be the cause.
Cats are primarily nocturnal; from the cute little house cats to the very dangerous pumas and lions. Also, they are great stalkers allowing them to sneak around at night making humans very paranoid. Being associated with the darkness of night didn't help their image because the color black has always been associated with evil due to our ancestor's fear of the night.
For a long time in Europe pagan religions such as witchcraft were the dominate belief. These religions were tightly associated with the animals of nature, including the cat. During the rise of the Christian religion in Europe, the church decided that witchcraft was evil and since they attributed cats to witches, cats were deemed evil by proxy.
Aside from the Christian accusations there are also old myths that may attribute bad luck to cats. Supposedly, King Charles I of England owned a black cat and the day it died he was arrested. An old sailor's legend said that meeting cats in the shipyard meant an unpleasant voyage of storms or other bad luck. In Babylonian folklore a curled up cat on the hearth is seen as similar to evil serpent.
Often times a cat will exhibit strange actions like seeing something that is unseen or batting at nothing in the air. This coupled with their amazing ability to see well in near darkness has created the myth that cats can see spirits or ghosts, another potentially evil pastime.
During witch trials, cats were often tortured and killed by Christian puritans along with the supposed witches. Some thought that witches had the ability to change shape into a cat, others thought that both cats and witches are evil so they must be in cahoots. Many people also think that witches sacrifice cats during their rituals which is foolish because witchcraft is a very nature-friendly religion. However, due to communal reinforcement, to this day many animal shelters will not allow the adoption of cats around Halloween for fear of their abuse.
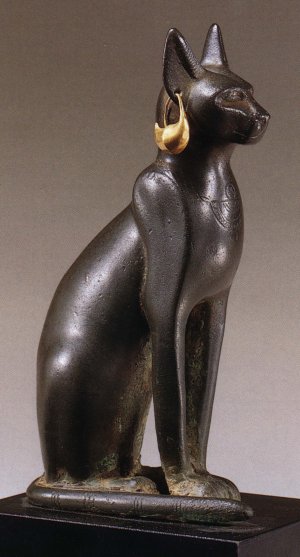
However, not every culture thought that black cats were bad luck. The ancient Egyptians treated cats with utmost respect. They were considered kingly animals and to kill one was a capital offence. The ancient Egyptians even went as far as to mummify their cats when they died to preserve them for the afterlife. They had a deity with the head of a cat named Bast to which they dedicated their mummified cats. The ancient Egyptians weren't the only culture who thought cats were special.
In Japan the Maneki Neko (Beckoning Cat) is considered a symbol of good luck. In Russia, their Russian Blue breed of cats are supposed to be good luck as well. In Latvian tradition, black cats embody the spirit of Rungis, a god of harvests, which is good luck for farmers to have around. In the UK black cats are associated with good luck, and have been for ages.
During witch trials, cats were often tortured and killed by Christian puritans along with the supposed witches. Some thought that witches had the ability to change shape into a cat, others thought that both cats and witches are evil so they must be in cahoots. Many people also think that witches sacrifice cats during their rituals which is foolish because witchcraft is a very nature-friendly religion. However, due to communal reinforcement, to this day many animal shelters will not allow the adoption of cats around Halloween for fear of their abuse.
However, not every culture thought that black cats were bad luck. The ancient Egyptians treated cats with utmost respect. They were considered kingly animals and to kill one was a capital offence. The ancient Egyptians even went as far as to mummify their cats when they died to preserve them for the afterlife. They had a deity with the head of a cat named Bast to which they dedicated their mummified cats. The ancient Egyptians weren't the only culture who thought cats were special.
In Japan the Maneki Neko (Beckoning Cat) is considered a symbol of good luck. In Russia, their Russian Blue breed of cats are supposed to be good luck as well. In Latvian tradition, black cats embody the spirit of Rungis, a god of harvests, which is good luck for farmers to have around. In the UK black cats are associated with good luck, and have been for ages.
Friday, October 10, 2008
Ghoulies & Ghosties
 Designed by Kelly Corbridge
Finished Quilt Size 55 1/2" x 71 1/2"
Number of Blocks and Finished Size 18 Sixteen-patch Blocks 8" x 8"6 Appliquéd Bat Blocks 8" x 8"6
Appliquéd Cat Blocks 8" x 8"5
Appliquéd Ghost Blocks 8" x 8"
You Need:Assorted medium/dark plaids and stripes (pieced blocks)... 2 1/2 -3 yds. Total Black solid (bats, cats, binding)... 1 yd. White solid (ghosts)... 1/4 yd. Rust/black plaid (border)... 1 3/4 yds.
Backing (piece widthwise)... 3 5/8 yds. Paper-backed fusible web 1 1/4 yds. Batting ... Twin size Sewing thread Machine quilting thread
Plan It!
.jpg) Templates are printed reversed and without seam allowance for use with paper-backed fusible web.
Templates are printed reversed and without seam allowance for use with paper-backed fusible web.Cut It! Assorted medium/dark plaids and stripes—cut a total of:... 288 squares 2 1/2" x 2 1/2" ...
17 squares 8 1/2" x 8 1/2"
Black solid... 6 Template A...
6 Template B White solid... 5
Template C Rust/black plaid...
4 strips 8" x 58", cut on lengthwise grain
Step 1. Arrange and sew 4 rows of 4 assorted medium/dark plaid and stripe 2 1/2" squares each (See Diagram I). Sew rows together to make Sixteen-patch Block. Make 18 total.
Diagram I

Step 2. Trace Templates A-C on paper side of paper-backed fusible web. Cut apart, leaving small margin beyond drawn lines. Following manufacturer's instructions, fuse to wrong side of appropriate fabrics; cut apart on drawn lines.
Diagram II

Step 3. Finger-press assorted medium/dark plaid and stripe 8 1/2" squares (Diagram II) as shown for each appliqué block; use folds as placement guide. Position template fabrics as shown (turning the bat differently on each square). Following manufacturer's instructions, fuse in place. Appliqué edges by hand or machine using buttonhole stitch Diagram III
 Step 4. Referring to Assembly Diagram, arrange and sew 7 rows alternating appliquéd blocks with Sixteen-patch Blocks. Note: Kelly arranged her appliquéd creature blocks in diagonal rows. Sew rows together. Stitch rust/black plaid 8" x 58" strips to sides; trim even with top and bottom. Sew remaining rust/ black plaid strips to top/bottom; trim even with sides.
 Assembly Diagram

Step 5. Layer and baste quilt top for quilting method of your choice. Kelly machine ditch quilted the seams and appliqué. She added a meander on the border. Bind quilt with black solid fabric.
Candy Cauldron

Even if your party guests don't have a sweet tooth, they'll be drawn to this bubbling candy display. Set a twig wreath on an end table or other flat surface; if the sticks are tightly woven, pull at their ends so the wreath appears slightly disheveled. Tuck a sheet of orange tissue paper in its center, and place a shallow glass bowl on top. Set a strand of small holiday lights in bowl, letting the cord dangle out. Drill holes in the lid of a one-gallon storage bucket. Position the bucket in the center of a large lobster pot (about 20 quarts), and nestle newspaper around it. Remove lid from bucket; fill bucket two-thirds with water. Add 1/2 pound of dry ice chunks to the water. (Handle dry ice with care; it should not come into contact with bare skin.) Replace lid, and arrange wrapped candy on top. Place pot on top of bowl in wreath, and plug in lights. This display should be set up in a well-ventilated area. The "smoke" will flow for a half hour.

Pillow Case Pumpkin Costume
 This simple but adorable pumpkin costume can be made using an ordinary pillowcase in about 1 1/2 hours.
Tools and Materials
Orange pillowcase
Measuring tape
Fabric
scissors
Pins
White chalk pencil
Spool of thread
1/4 yard brown felt
1/2 yard green felt
Fabri-tac
Orange cording
Sewing machine
Pumpkin Costume
How-To
1. Turn pillowcase inside out, fold in half and lay flat, making sure to match folded edge with stitch line of pillowcase.
2. Measure from child's neck to inner thigh, then add an inch for ease and seam allowance.
3. Trace a 5-inch half circle for the arm hole, 1 inch away from flange. Using fabric scissors, cut arm holes in fabric. Pin fabric in place to prepare for sewing. Sew hem using straight stitch.
4. Enlarge template 200 percent; print. Trace template on brown felt using white chalk pencil. Cut felt pieces around template.
5. Using fabri-tac, take cut face pieces and attach to fabric. Push orange cording through to create drawstring. Knot cord and fray check ends.
Stem Hat How-To
1. Enlarge template 175 percent; print.
2. Cut stem pattern on the fabric fold. Sew back seam, right sides together. Sew circle in top opening, wrong sides together. Trim seams if needed.
Treat Bag How-To
1. Create a treat bag by making a drawstring bag with the excess end of the pillow case. Round the corners of the bag and use fabri-tac to glue on a smaller pumpkin face (using pumpkin face template ), and sew green felt around the top.
.jpg)
.jpg)
I have provided the templates you will have to enlarge as big as you need them. Just right click and save :)
Eyeball Highball

At Halloween -- the one time of year when the grotesque, gruesome, and horrifying are worth aspiring to -- take the opportunity to express your holiday spirit with just the sort of drink Dr. Frankenstein might have enjoyed during cocktail hour. With medium-size radishes and olives, you can create creepy ice cubes that appear to contain eyeballs -- ideal for a macabre martini on the rocks or in a ghastly glass of flavored seltzer for your young ghouls-in-training.
Trim the stem and root ends of a radish (make sure it's small enough to fit the individual section of an ice-cube tray), and use a paring knife to scrape off most of the red skin. Leave just enough red to give the radish a veined appearance. Rinse the radish off, and use a small melon baller to cut 1/2-inch-diameter hole into the radish. Fit an olive, cut side out, into the hole, and place the radish in the ice-cube tray. Repeat this process until the tray is full, then pour water over the eyeballs, and freeze.
Trim the stem and root ends of a radish (make sure it's small enough to fit the individual section of an ice-cube tray), and use a paring knife to scrape off most of the red skin. Leave just enough red to give the radish a veined appearance. Rinse the radish off, and use a small melon baller to cut 1/2-inch-diameter hole into the radish. Fit an olive, cut side out, into the hole, and place the radish in the ice-cube tray. Repeat this process until the tray is full, then pour water over the eyeballs, and freeze.
Thursday, October 9, 2008
Glittered Pumpkins

Tools and Materials
Small pumpkins
Glitter
Teak
Paintbrush
Craft glue
Paper plate or newspaper
Brown acrylic paint
Glittered Pumpkins How-To
Glittered Pumpkins How-To
1. With a paintbrush, spread glue over the surface of a small pumpkin. Place pumpkin on a paper plate or newspaper to catch excess glitter.
2. Sprinkle powder glitter over glue, covering completely. Let dry for an hour, then shake off excess powder.
3. Coat stem with brown acrylic paint, let dry. Once dry, the stem can also be done in brown glitter.
Tips- It's easiest to do half the pumpkin and sprinkle with glitter, let dry, and continue other half.- There's no need to completely cover the bottom, since it's not seen.- Also, it's fine if your pumpkin has marks or mild blemishes, since you will be covering it with glitter.
Ladies' fingers and Men's toes

This ghoulishly good recipe for is from "Best of Martha Stewart Living -- Halloween."
Ingredients
Makes 4 dozen.
Red or green food coloring (optional, for fingers)
24 blanched almonds, halved lengthwise
2 cups warm water (110 degrees), plus 3 quarts, plus 1 tablespoon
1 tablespoon sugar
1 package active dry yeast (1/4 ounce)
Vegetable oil
5 to 6 cups all-purpose flour, plus more for work surface
1 tablespoon coarse salt
2 tablespoons baking soda
1 large egg
Sea salt
Fried rosemary (optional, for toes)
Directions
Place a small amount of food coloring, if using, in a shallow bowl, and, using a paintbrush, color the rounded side of each split almond; set aside to dry.
Pour 2 cups water into the bowl of an electric mixer fitted with the dough-hook attachment. Add sugar; stir to dissolve. Sprinkle with yeast, and let stand until yeast begins to bubble, about 5 minutes. Beat in 1 cup flour into yeast on low speed until combined. Beat in coarse salt; add 3 1/2 cups flour, and beat until combined. Continue beating until dough pulls away from bowl, 1 to 2 minutes. Add 1/2 cup flour. Beat 1 minute more. If dough is sticky, add up to 1 cup more flour. Transfer to a lightly floured surface; knead until smooth, 1 minute.
Coat a large bowl with cooking spray. Transfer dough to bowl, turning dough to coat with oil. Cover with plastic wrap; let rest in a warm spot to rise until doubled in size, about 1 hour.
Preheat oven to 450 degrees. Bring 3 quarts water to a boil in a 6-quart straight-sided saucepan over high heat; reduce to a simmer. Add baking soda. Lightly coat two baking sheets with cooking spray. Divide dough into quarters. Work with one quarter at a time, and cover remaining dough with plastic wrap. Divide first quarter into 12 pieces. On a lightly floured work surface, roll each piece back and forth with your palm forming a long finger shape, about 3 to 4 inches. Pinch dough in two places to form knuckles. Or, to make toes, roll each piece so that it is slightly shorter and fatter, about 2 inches. Pinch in 1 place to form the knuckle. When 12 fingers or toes are formed, transfer to simmering water. Poach for 1 minute. Using a slotted spoon, transfer fingers to the prepared baking sheets. Repeat with remaining dough, blanching each set of 12 fingers or toes before making more.
Beat egg with 1 tablespoon water. Brush pretzel fingers and toes with the egg wash. Using a sharp knife, lightly score each knuckle about three times. Sprinkle with sea salt and rosemary, if using. Position almond nails, pushing them into dough to attach. Bake until golden brown, 12 to 15 minutes. Let cool on wire rack. Fingers and toes are best eaten the same day; or store, covered, up to 2 days at room temperature.
Glittered Bones and Bugs
 These glitter bones and bugs are an eerie but elegant decoration for Halloween.
Tools and Materials
Skull and bones
Glitter
Craft paper
Craft brush
Glue
Large shallow bowl or tray
Plastic bag of Bones
How-To:
1. Working over a sheet of craft paper, use a craft brush to apply glue to half of a skull or bone.
2. Hold object over a large shallow bowl or tray. Spoon glitter over glued surface. Place on a tray; let dry for at least an hour. Repeat process.
Bugs 1. Apply glue to bugs. Place bugs in plastic bag filled with glitter. Twist top of bag and shake.
ResourcesThe skull and bones and glitter can be found at Martha Stewart Crafts.
Wednesday, October 8, 2008
Glittered Halloween Tree

Perfect for hanging your favorite handmade Halloween ornaments, spiders, treat boxes and party-favor cones, this tree can be made in any size you like.
Tools and Materials:
Tools and Materials:
TapeBlack
glitter12-foot copper electrical wire (7 strands coiled)
Medium cast-iron urn
Plaster
Sheet moss
Hot glue and hot-glue gun
Faux distressed leaves
Double-round needle-nose pliers.
1. Using tape, seal the hole in middle of urn.
2. Glitter urn; place on tray to dry.
3. Form tree with wire by tying wire together.
4. Mix and pour plaster into urn.
5. Set wire in plaster and let dry overnight.
6. Shape branches.
7. Cover plaster with sheet moss.
8. Twist roots to in desired shape.
9. Hot glue leaves on moss and tree.
10. Fill tree with ornaments.
Resources:
All tools and materials can be found at hardware and crafts stores.
Halloween Treat Crackers :)

 Start with this little ole tube :)
Here’s a green Halloween craft project that’s simple, creative, and kid friendly. “Treat tubes” make a fun and DIY alternative to store bought treat sacks and can be used at Halloween parties or given to trick-or-treaters. They’re just big enough to fit things like fruit strips, candies, little toys, and mini Fair Trade chocolates. Plus, it’s a great way to use up all those TP tubes!Just start with an empty toilet paper tube, fill it with small treats, wrap it in paper, twist and tie up the ends with ribbon, and add any sort of decoration you want to the outside. You probably already have all of the supplies needed such as glue, scissors, and of course toilet paper tubes. For embellishments you can buy store bought decor such as scrapbooking supplies, or go totally DIY and use items from around your house. Halloween is really about creativity so just take these treat tubes in whatever creative direction you’re feeling.
Frog Eye Salad @@

Witchie's Frog Eye Salad
Serving Size: 25 warthogs.
Ingredients:
1 cup sugar
2 teaspoons flour
1/2 teaspoon salt
1 3/4 cup pineapple juice
2 eggs - beaten
1 tablespoon lemon juice
3 quarts water
2 teaspoons salt
1 teaspoon cooking oil
1 package Acini de Pepe (A type of pasta) - you can always substitute
3 cans mandarin oranges (11 ounce each) drained
2 cans crushed pineapple (20 ounce each) drained
1 carton Cool Whip (12 ounce)
Directions:Combine sugar, flour, 1/2 teaspoon salt. Gradually stir in pineapple juice and eggs. Cook over moderate heat, stirring until thickened. Add lemon juice. Cool mixture to room temperature. Bring water, 2 teaspoons salt, and oil to boil. Add Acini de Pepe. Cook at a rolling boil until Acini de Pepe is done. Drain and rinse with water, drain again and cool to room temperature. Combine egg mixture and Acini de Pepe, mix lightly but throughly. Refrigerate over night, in an air tight container. Add remaining ingredients, mix lightly, but throughly - (Use a very large Tupperware bowl with a lid) and chill. Salad may be refrigerated as long as a week in air tight container.
May add a package of colored marshmallows.

Subscribe to:
Posts (Atom)